Showing posts with label coding. Show all posts

Saturday, June 16, 2018

Ok Google, Open my curtains!

Finally I've found a worthy enough reason to write a blog post.

I've been wanting to make the curtains in my home "smart" for a while now. I have what is called "grommet curtains"  and there are apparently no off the shelf solutions to automate this. There is this kickstarter project called Slide which retrofits to any curtain type, but that is still in its early stages and a bit pricey (~$150).

I ran into a tutorial which spoke about automating grommet curtains. But they used a 3d-printer to print custom designed components which wasn't an option for me (I don't have a 3d printer and i don't have any knowledge of how to design components for a 3d printer).

I borrowed the basic idea from that video. Two pulleys at either end with a rope running around them. One of the pulleys is attached to a servo which is controlled by a microcontroller. Here's an awful sketch of the idea:

Here are some of the challenges faced/things i did:
  • There is no cheap off the shelf servo that has a pulley attached to it. So i had to tweak around to figure out a way to mount a pulley to the servo.
  • The load on the servo to pull the rope along with the curtains is pretty high. So the servo has to be mounted securely to the wall. I first tried a heavy duty double sided tape, but that wasn't enough to withstand the tension of the rope. I then tried out various things and found a mount that could be screwed into the wall.
  • The wall mount for the servo held it too close to the wall and there was no room for the pulley (whose diameter is larger than the breadth of the servo) to fit in and rotate smoothly. So i used a couple of washers behind each mounting screw to give enough room for the pulley.
  • To tie the other pulley (which has no motor), i simply used a rope to tie the pulley on to the curtain rod's mounting bracket.
  • The servo had to have metal gears in order to have enough torque to pull the curtains. But such servos need a minimum of 4.8 volts of power. I found a NodeMCU board which had a 5V pin to supply enough power to the servo.


Here are the list of parts with links to where i bought them:

* NodeMCU (ESP8266) microcontroller (model with 5V pin) - Amazon - $5.98
* Jumper wire (to connect to the 5V pin) - Amazon - $5.24
* MG995 Servo (360 degree, metal gear, digital model) - Amazon - $10.99
* Servo wall mount - Amazon - $12.99
* Washers - I just used a couple of old washers lying around. Equivalent link: Home Depot - $2
* Pulley (for attaching with servo) - Servocity - $3.49
* Pulley (for the other end) - Home Depot -  $2.47
* Rope - Home Depot - $3.98
* Safety pins - Amazon - $3.15

Total Cost - $50.33 (some of it can probably be gotten for a cheaper price on ebay/gearbest/aliexpress).

Ok, with all that out of the way, let me explain how exactly i built and programmed this.

Step 1 - Attach pulley to the servo

Attaching the winch pulley to the servo is quite straight-forward. I screwed in the 4 pieces of the pulley with 2 bolts (on diagonally opposite ends) and small hex nuts. I then attached one of the servo horns to the other two holes of the pulley with two small screws (that came with the servo).

Now, the servo horn can merely be screwed into the servo until it's fairly tight.

Step 2 - Install the mounting bracket

After marking two spots with the mounting bracket's holes, i drilled in two drywall anchors on those spots. Then use two screws to screw the mounting bracket into the wall placing two washers in between the mounting bracket and the wall. This makes sure there is enough room to mount the servo along with the pulley.
This is the bracket i used to mount the servo to the wall
Step 3 - Attach servo to the mounting bracket

This is very straight-forward. The only catch is i used two nuts instead of 4 to attach the servo on to the mounting bracket.
Servo mount with washer behind. Pulley attached to the servo.
Step 4 - Mount the pulley on the other end

I used a small rope to tie the pulley on to the curtain rod's mounting bracket on the other end. A nut and bolt can also be used but since the rope worked for me i didn't look further.

Step 5 - Tie the rope on to the pulleys

Loop the rope around the pulley without the servo once. In the servo end, loop the rope around the pulley at least twice and then tie a really stiff knot. Make sure that the rope is really tight. Cut off any extra rope since it could cause friction when the rope is moving.
Rope tied to the pulleys and attached to the curtains.
Step 6 - Attach the curtains to the rope

I used a couple of safety pins to attach the curtains to the rope. I set the curtains in fully closed positions and then attached each half to one of the ropes. When the pulley spins, both the ropes will move in opposite directions thereby opening each curtain outward. The same process is reversed to close it.
Curtains attached to the rope with safety pins.
Step 7 - Program the microcontroller

This is my first foray into programming a microcontroller and surprisingly enough it was really simple. The NodeMCU ESP8266 board is a $5 wifi enabled board. Wifi means that you can send commands to it through simple HTTP requests.

Here's the arduino sketch i used to make a simple HTTP server that supports 3 commands: left, right and off (which spins the servo left, right and turns off respectively): https://gist.github.com/vickyg3/94b80435fa10a58691f563f643aaf807

Once this is flashed into the board, controlling the servo is simply a matter of "curl http://<ip>/left".

Step 8 - Mount the microcontroller

I mounted the microcontroller near the servo (using a small double side tape on the wifi chip) and just attached the servo wires to the appropriate pins (i used a jumper wire to connect the power wire to the 5 volt pin). I then ran a long micro-usb cable that i had lying around to power the microcontroller.


Step 9 - Home Assistant configuration

I added this to home assistant as a command line cover that used curl. Here's a sample configuration:

Where curtains.sh contains the following:

I determined the time to sleep between rotating the pulley and turning it off by trial and error. It usually took more time to close than to open because the set up struggled a bit to pull the curtains in that direction. It now shows up in home assistant, like so:


That's it. You can now include this in your automations, etc. I have set up automations like close the curtains after sunset, when we are away and so on.

If you have your home assistant tied to google assistant, you can control the curtain by saying "Ok Google, Turn the <curtain name> on/off". If you want custom commands, you can also try ifttt with google assistant to have commands like "Ok Google, open my curtains!".

Here's the Eureka moment

Some cons of this system:
  • The servo is a bit noisy. This is probably ok given that curtain control is not too frequent. It is probably bearable for 10 seconds or so once in a while.
  • Hooking up the curtains this way makes it impossible to control the curtains manually (since the curtains are tied to the rope). I've worked around this by sticking a button next to the curtain by the wall for those scenarios where we don't want to use voice control. Pressing the button will open/close the curtain.
    Button to control the curtains in lieu of voice/phone control.

Comments and suggestions about improving this in any way are welcome!

Monday, November 4, 2013

Introducing Super Secure File - One File, Completely Secure, Access Anywhere!

Super Secure File gets you a really secure password protected file that you can access anywhere with an internet connection. Smartphone, Tablet, Laptop, SmartTV, anything!

To cut to the chase and create your Super Secure File, go to: http://secure.foamsnet.com.

How does it work?

Super Secure File basically uses Google Drive to store your encrypted file and does all the encryption and decryption locally in Javascript. The key never ever leaves your computer. Once you close the tab, boom, the key is gone. Nobody knows the key but you (and probably your spouse if you are married).

Motivation

This is not a big feat or anything, this is merely a mashup of a few libraries to prove a point to myself. The motive behind this app is to build a secure mechanism to store my passwords and credit card numbers on the cloud so that I can access it anywhere. I do not trust anyone who links me up to a server when it comes to information like this. Which is why i wanted a completely static HTML page with no server access whatsoever to provide me with this functionality.

Feel free to examine the source code here (and please let me know if you find anything utterly stupid): https://github.com/vickyg3/super-secure-file

Hosting and Links

Since this is a static page, I have not hosted this on my server. This is merely hosted as a github page (if you look at the repo, you'll see the default branch to be gh-pages and not master). Hosting it as a github page also proves that it has no server interaction whatsoever and cannot steal your key by any mean.

So, all you need is to remember your password and one of these URLs (they all redirect to the same Github Page): http://bit.ly/securefile or http://bit.ly/supersecurefile or http://secure.foamsnet.com or http://vickyg3.github.io/super-secure-file/super_secure_file.html

Get your Super Secure File and make your life a little easier! :-)


-Vignesh

Wednesday, October 23, 2013

Open sourcing Social Photos

I have been working on a lot of open source projects lately (chromium, AOSP, ffmpeg, etc.) and I have had this tremendous change in the way i look at software projects now. I am all the more convinced that open source is the only right way of doing software.

With that in mind, I've made a pledge to myself that no matter what I do, I am going to put the source out there. As a first step, i'm open sourcing the one big project of mine, Social Photos.

The source can be found here: https://github.com/vickyg3/social-photos

It is a snapshot of the one that's currently powering the live site: http://socialphotos.net (with API keys redacted). Feel free to fork and use as you please. Although i'd appreciate a link back, it's not mandatory. Also, i'll be more than happy to look at Pull Requests.

One of the main reasons that developers (including myself) don't post our code out there is that we are ashamed of our code. I was really ashamed by the number of hacks i did in this project that i couldn't even think of making it public. I'm over it. I'm ready to accept people fixing my mistakes.

Happy Coding!


-Vignesh

Wednesday, September 11, 2013

VLC Media Player: Automatically Skip Songs in Indian Movies!


I watch a lot of movies. Really a lot. And VLC Media Player is my (and many others') favorite. Indian movies are plagued with songs in irrelevant times and most of the time it just interrupts the pace/flow of the movie. No offense to music lovers/music makers, I like listening to songs in general. But I don't like them in the middle of an important scene in the movie.

The Problem

Whenever a song starts, inevitably I try to use the seek bar (using the seek bar is really one of the big pain points of any media player as it almost never takes you to where you want) and seek to the end of the song. Most of the time I end up seeking either just after the song (thereby missing something important) or to some portion in between the song (thereby having to wait for some more time for the song to end).

As an engineer, I naturally wondered, Wouldn't it be wonderful to have an automated way (preferably a keyboard shortcut) to just skip the song and move to the more important stuff?

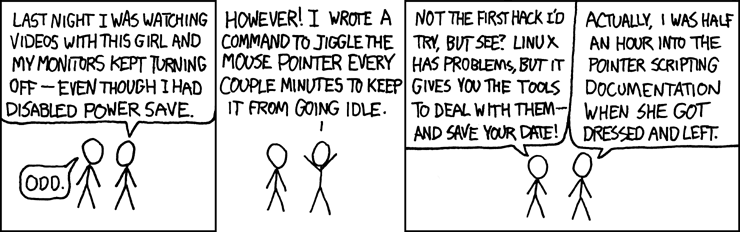
This is exactly what I sat down to solve. Based on this xkcd, it seemed like it would be worth the time.And I (sort of) have a perfect solution that helps me skip songs automatically in the press of a button in VLC Media Player.

The Solution

As hard as the problem might seem, I ended up using a very simple heuristic. Start analyzing the audio stream, and whenever there is a silence for about a second or so, it's likely that the song ends there. I just came up with this heuristic based on the fact that most Indian movie songs are continuous (either lyric or the music goes on throughout the song without any breaks) and when the song ends, there is usually a small interval of silence before the next scene starts. And if there is a silence somewhere in between the song, just do the analysis again and it will take you to the next silence which is most likely the end of the song.

Is it perfect? Absolutely not. It's not even a solution, it's more of a heuristic (aka hack) which exploits some pattern in the Indian movie songs. And in my observation (I have been using this for quite a while now), It seems to be working correctly 99% of the time.

Implementation Details

Note: This section has technical jibber-jabber. If all you care about is how to use the script in your VLC media player, skip ahead to the "Usage" section.

First things first, I chose VLC media player, because that's the one I use. If you aren't using it, then you should start using it too. To begin with, we need to query VLC Media Player.

The overall flow goes something like this:
  1. Get the name of the file that VLC is currently playing
  2. Get the time point of the current playback from VLC
  3. Analyze the audio stream of the file and detect the next silence beginning from the time point of current playback
  4. Seek VLC to the determined duration where silence was detected (this is likely the end point of our song)
As complex as these steps might seem, they are fairly trivial to accomplish. To perform steps 1, 2 and 4 all we need to do is enable the HTTP interface in VLC. Once that's done, it is straightforward to get details of playback and control the player through a simple HTTP interface. The 2nd step is a little more tricky as it involves analysis of the audio stream of a file. Fortunately, we have a swiss army knife in our hands which will not only analyze the audio stream, but pin point us to the exact location of silence that we are looking for. The tool is none other than FFmpeg. The silence detect filter in ffmpeg has been used to accomplish this.

Here is a rough sketch of the ffmpeg command that I use:

ffmpeg -ss <start_time> -i <input_file> -t 600 -vn -af silencedetect=noise=0.1 -f null -

Let me break that up:
  • -ss <start_time> :- seeks to the specified time in the input file. this value for this is obtained from VLC's HTTP interface
  • -i <input_file> :- absolute path of the file that VLC is currently playing. this value is obtained from VLC's HTTP interface
  • -t 600 :- analyzes only 600 seconds (10 minutes) of audio to detect for silence (as Indian movie songs are hardly longer than 10 minutes).
  • -vn :- ignore the video
  • -af silencedetect=noise=0.1 :- enable the silence detection filter with a threshold of 0.1dB. this value was picked by trial and error.
  • -f null - :- just print the output of the filter in stdout rather than a file.

We then grep for the exact duration and then seek VLC based on this output.

Code

Look into the variables on top of the file and change them as per your environment if required.

Usage

To use this script, you need to install the following (fairly straightforward if you are tech-savy, but doable even if you are not).


Once you do the above steps, all you need to do is to bind a keyboard shortcut such that the script will execute. For Mac, I used Keyboard Maestro to set up a global keyboard shortcut which will invoke the script. There should be an equivalent program for Windows/Linux too. So that whenever a song starts, I merely use the keyboard shortcut to skip it.

Hope you enjoy it.


-Vignesh


Education is a cure for all problems. Donate for the cause of Educating kids: Computer Kindness Foundation is helping schools to build Libraries. Follow the link to contribute.

Sunday, July 14, 2013

Announcing Social Photos v2!

I have been working on this side project for quite a while now and I am happy to announce that it is launch ready now!

Visit http://socialphotos.net to manage all your digital photos across Social Networks in one roof using a simple intuitive user interface.

Features Include:

  • Transfer Photos
  • Transfer Albums
  • Download selective albums as a zip file
  • View Slideshow of your albums
  • Monitor progress in a simple pane
  • And much more!

Please do feel free to give feedbacks/suggestions. Use it and Share it!


-Vignesh

Tuesday, April 23, 2013

Solving Boggle (Scramble with Friends) with a Bot!

Headnote

I am always fascinated by Android games, especially puzzle games. This is how it usually works with me and a puzzle game. I start playing them with random friends. They beat me and I beat them on and off. Then I sit and think, this is so monotonic and algorithmic that a human being shouldn't be sitting and doing it. Then I sit with the computer (with my favorite monkeyrunner Jython in it) and try to come up with a simple algorithm for it. Then i plug in the standard monkeyrunner code to actually feed the output of the program back to the device. Then I usually become #1 among my friends in the leaderboard (often even in the global leaderboard) ;-)

This is one such scenario. Zynga's Scramble with Friends has been really popular among my friends off late. So i hit this routine cycle and ended up with a beautiful bot which usually scores a centum (like the one TamBrahm parents force their kids to get in Mathematics).

With that out of the way, let's begin.

Objective of the Game

The game consists of a 4x4 grid of letters. You have to form as many words you can by starting from a letter and by moving to one of the (upto) 8 adjacent letters. Dead simple, but really interesting and addictive.

The first thing needed to solve this is a dictionary of words. I went on the internet and downloaded a plain text dictionary file which had about 170k words in it. Good enough to start with.

Algorithm - Breadth First Search

The number of valid words is usually very limited. In most games, the total number of valid words is usually < 400. So, a simple Breadth First Search (BFS) will do starting with single letter elements and then add the neighbors recursively. One key insight is, if you come across a prefix that never occurs in the dictionary, you can discard that prefix at that point instead of adding it to the traversal queue.

A rough sketch of the algorithm is as follows:
  • queue = [all 16 characters]
  • while queue is not empty:
    • word = head of queue
    • if word is in dictionary output it [1]
    • for all neighbors adjacent to the last character of word
      • new_word = word + neighbor
      • if dictionary has words with prefix new_word, add new_word to the queue [2]
That's it. Straightforward implementation of a BFS-like algorithm.

Choice of Data Structure

The key to solving this problem efficiently lies in choosing a good data structure for implementing the dictionary. The dictionary needs to support two major operations. One is looking up if a word exists. This is used for step [1] in the above algorithm. The other operation is, given a prefix, check if there is atleast one word containing that prefix in the dictionary. This is used for step [2] in the algorithm mentioned above.

Array ?

One good looking candidate is using a simple array (note that the dictionary is already sorted for us). Look up can be performed using simple binary search. Prefix checking can also be performed using a modified binary search (if search succeeds, then prefix exists. if search fails, prefix existence can be determined by looking at the bounds in which the search failed). Also, note that the dictionary has ~173k words. So, searching is gonna take log(173k) which is approximately 18 hits in the worst case. This is a totally fair deal.

Trie ?

Another possibility is using the Trie, whose raison-d'etre (very reason for existence) is to implement such dictionaries. The Trie implementation is also fairly trivial (since we require only two major operations apart from Trie construction). In the Trie, both the operations are gonna take as many hits as the length of the word or the prefix being looked up. So asymptotically, both these data structures are more or less similar and we don't have a big advantage in using either one over the other since our output is always gonna be < 400 words.

I decided to go with the Trie. After reading this article about Trie implementations in Python, I decided to quickly write my own implementation of Trie. Also, this made life simpler as I couldn't quickly find any good resources about using external libraries within monkeyrunner.

Implementation Quirks

Since I had already used monkeyrunner a few times before, implementation turned out to be pretty straightforward. The following are a few implementation quirks and nuances that the script deals with:
  • Input is manually entered as a raw row-major string of length 16.
  • If the same word can be formed by two different combinations, only one combination is actually considered valid. This is overcome by storing a list of already found words in another Trie.
  • Even though the script finds smaller words first (because of BFS), it actually starts outputting words of length >= 5 first and then after it has exhausted all the lengthier words, it then outputs the smaller words in the reverse order of length (4,3,2). This is to maximize points in case we don't find time to output all the words.
  • The game offers three lifelines. I found the freeze option to be useful to the bot (as each freeze gives you 15 additional seconds of game time). So, the script automatically taps on the freeze lifeline every 30 seconds.
  • We also need to store the co-ordinate of each letter in the queue along with the letters themselves in order to simulate the output in the device.
  • The co-ordinates are hard-coded for Nexus 7 portrait mode.

Code

The whole implementation can be found here: https://github.com/vickyg3/scripts/tree/master/scramble_bot

Sample Video

Here is the exciting part. This is how it looks like when my bot plays the game:


It's always a very nice feelings to watch you script do such beautiful things.

-Vignesh

Wanna do some good deed? Visit http://www.computerkindness.org (Or look for the banner in the top-right of this page).

Saturday, April 20, 2013

C++ COW Craziness

Note: This isn't one of those Linus'ish articles that bitches about C++. I like C++ and I would just like to point out one of the many nuances in the language that could affect the performance of your program without your knowledge.


C++ STL's string class promises Copy-on-write. What that means is that, you can make as many copies of the string, but the actual memory duplication will happen only when one of the strings are actually written to (i.e.) no memory duplication will be made for copies that are made for pure reads. Or atleast that's what I thought, until I discovered today that, if you use the [ ] operator on the string, you rig the COW functionality of it forever. It is something that you normally don't do, but doing so could cost you a lot of performance. Let's run through an example.
string s1(1024 * 1024 * 16, 'g');
for(int i = 0; i < 1000; i++) {
  string s2 = s1;
}
This runs in 19 milliseconds. That's because (obviously) there are no actual copies made. Just 1000 pointers being created to the existing 16 megabytes of data. Now, lets try modifiying the copied string.
string s1(1024 * 1024 * 16, 'g');
for(int i = 0; i < 1000; i++) {
  string s2 = s1;
  s2[0] = 'v';
}
This runs in 4.3 seconds. That's right, from 19 milliseconds to 4.3 seconds for making 1000 actual copies of 16 MB of data. This is the expected behavior, a copy is done when you try to write to it. Next comes the weird part, consider the following code:
string s1(1024 * 1024 * 16, 'g');
for(int i = 0; i < 1000; i++) {
  string s2 = s1;
  s2[0];
}
Guess how much time this should take? Intuitively it seems like this should hit the COW fast path (i.e.) no actual copies, because there is no "write" here. This takes 4.3 seconds too! The problem behind the [ ] operator is that, you can easily stash away a pointer to some portion of the string and modify it later thereby screwing up the state. So, it is impossible to perform COW once you use the [ ] operator on a string. The following snippet illustrates this:
string s1("hello");
char *p = &s1[2];
string s2 = s1;
*p = 'v';
You see what happened there? You stashed away a pointer to the middle of the string and then tried to change it later after the copy. This is sort of an indirect write, and there is no way for the compiler to determine this. So, the moment is sees the [ ] operator, it removes the COW functionality for that string. One way to do such a read without rigging the COW functionality is to do a crazy cast like this:
string s1(1024 * 1024 * 16, 'g');
const_cast<const string &>(s1)[0];
for(int i = 0; i < 1000; i++) {
  string s2 = s1;
}
This snippet takes the fast COW path and runs in 20 milliseconds. The takeaway from this article is that, do not use the [ ] (or the .at()) operator on strings, especially large string that could be copied later on. Even though you think you're doing an harmless read, you are rigging the COW functionality of that string forever. You are paying the price for that pointer you stashed away (or may be even released long back) without knowing.

 -Vignesh

Saturday, June 23, 2012

Convert your keyboard into an Android game controller!

I have been gifted with a new android phone. It's the big G branded Galaxy Nexus. Its blazingly fast and awesome to use (especially after years of HTC Wildfire usage). Right from day one, i have been really addicted to this game called Temple Runner which wasn't compatible with my old phone.

The game is very straightforward to play and it involves only 4 different operations. Swipe up, left, right and down. Coming from a strong keyboard background, I was never 100% comfortable with touch interfaces as i was with keyboard. And these 4 operations sounded analogous to the accelerate, brake and turn operations while playing a racing game in the computer keyboard.

That got me thinking, is there a way to make the computer keyboard into a game controller for my Android phone? Turns out its fairly straightforward. In this post i'll explain exactly how to do that.

Ingredients
  • Android phone (obviously)
  • USB cable connected in debugging mode
  • Android SDK installed
  • Very very basic python english
There's a tool named monkeyrunner which enables us to send operations from the computer to the phone via a very simple Python API (monkeyrunner tool is a part of Android SDK). A sample code for a controller would look like this:

Code until line 7 is fairly straightforward to understand. The only thing that i would like to explain here is the device object. It is an object of the MonkeyDevice class. This class has all the API methods that you need to use in order to simulate the operations. For example, device.touch(100, 200, MonkeyDevice.DOWN_AND_UP) will simulate a touch event at co-ordinate 100, 200 (with the origin being top left). As simple as that!

You can find the detailed documentation of the monkey device class to know about other methods like drag, type, etc.

The full code which i used for playing Temple Run game is given below:


One point to note is that, the sys.stdin.read(1) line will read one character and wait for the enter key to be pressed. This could be annoying given that you are writing a game controller. In order to avoid the enter key press, if you are on linux run "stty raw" before running this script and if on windows use the getch function in msvcrt module.

-Vignesh

Saturday, May 7, 2011

Orkut Deja Vu - The Technical Side!


Its been almost two months now since I first launched "Orkut Deja Vu" - A series of web applications and a chrome extension that helps you move your memories from orkut to facebook. Personally, I think the application was a good hit. In this article i will try and explain the technical side of it and the various hurdles faced on the due course of development.


Note: This article is for the technically inclined and if you don't want the technical details and just want to use the application, visit http://orkutdejavu.foamsnet.com!


Java and My server!


To begin with it, my server is a VPS running linux with a humble 700MB RAM and a shared processor. My search for an Orkut API ended with orkut os client - An official API provided by Google. This is more of a library than an API and only the java implementation of the library was very sophisticated (though there were php implementations, they weren't that good). Ever since i started learning computer science, if there was one thing i hated, it was java (now don't even get me started about perl).


So there lied the first problem in front of my eyes: Running java in my server. I didn't want to take up the pain of setting up JSP for this sake and decided to just call the java program that does the orkut calls from PHP using shell_exec. I know it isn't a safe option, but since there is no user passed data and the calls are hard-coded, i was sure that there was no injection vulnerabilities. Yet this approach isn't very efficient as it spawns a separate java vm for every exec call, but it was a compromise that i had to make for not setting up a java based server.


OAuth - The headache!


The orkut library's OAuth implementation was really messy. Fortunately, it had a method to explicitly set an OAuth access token obtained from elsewhere. That said, I used Zend OAuth library in PHP to perform the 3 legged OAuth and use that access token in the java programs. There were totally four java programs: one each to fetch the user's orkut name, albums list, photos and scraps. The java programs printed the output as JSON if it was successful or nothing if there was an exception. PHP then parses that JSON. I used JSON so that all the escaping will be taken care by the JSON libraries and thereby ensuring safety of data transmission.


Photo Album Migrator


The photo album migration was quite straight forward without much hurdles. All i had to do was integrate the following: Image gallery, Facebook API, Orkut API and write some simple javascript that made AJAX calls to transfer the photos. This was quite a cakewalk as i was already very familiar with the Facebook graph API.


Scrapbook Downloader


Again, the programming side of this was quite straight forward. But there was one major challenge involved in designing this. The java program generates a html file containing the scraps which is then converted to PDF. HTML to PDF conversion is CPU intensive and hence needs to be done with care. I could have used a resource manager like Sun Grid Engine, but i did not want to make things complex for a simple job to be done. Also, the conversion is not done programatically by a library as all the PHP PDF libraries were memory-wise very expensive (a file with ~100 scraps always exceeded PHP's memory limit of 64MB). So, I used a external command line utility (wkhtmltopdf) to accomplish this conversion. Again it was a simple shell_exec with hard-coded arguments.


Testimonials Migrator


This was the really challenging part. There was no Orkut API that gave access to users' testimonials. But i didn't want to give up. I really wanted to pull off a tool that can migrate testimonials to facebook. So I thought of attacking this problem from the heart of orkut - the orkut website. Obviously, the first thing that came to my mind was a Google Chrome extension. The extension will inject a javascript into orkut.com website and add a "Post to Facebook" button beneath eacch of your testimonials.


The first hurdle in accomplishing this was that there were two versions of orkut (old and new) with different page structures. I didn't want to write two different scripts to handle the versions. Instead i wrote another script that detects the version and if it is new, it prompted the user to redirect to the older version in order to use the extension. The next job was to understand orkut's DOM so that I can place the buttons. This ended up being quite an easy job too.


Another glitch in chrome extensions is that we cannot specify images directly in CSS for content scripts(for e.g.: background: url(a.jpg); is not possible), as the CSS will run in the scope of the website. So, it has to be either done programatically using javascript or encode the image in base64 and hard code it in the CSS. I chose the first option. From this point, it was fairly straight forward. When the user clicks on the post button, store the corresponding testimonial using HTML5's local storage and create a new tab where the user can choose the posting options. Again, the facebook authentication and API usage here were simple as i had enough exposure already.


Epilogue


Though it seems like a simple app, huge amount of thoughts are put into every single aspect in design of the application and the entire development process was a fun journey with a great learning curve. This application has made me feel my web presence. Web is really a great platform for amateur developers like me. I have got around 20 new followers in twitter and a person from brazil appreciating me for this application. I have really been motivated a lot by this and hope to continue the same stride in creating usable applications as this one!


This post will not be complete without a heartfelt thanks to all those who supported me on due course of development and all those who used and shared this with your friends!


-Vignesh

Tuesday, December 14, 2010

Why Computer Science should not be taught with Python!

Every Computer Science student begins his academic travel with the first stop being C. It is really a good language to begin with and it helps the student to grasp the fundamentals of how a computer program works. And (atleast in India) most of the Computer Science courses just revolve around C/C++ almost the entire of the curriculum. All the laboratory classes usually mandates the student to develop programs in C/C++ or Java in some cases.

Any student who has worked for a reasonable amount of time with a language like Python or Ruby will be against this system. He will be frustrated in writing tens of lines of C code when the same can be accomplished in very few lines in Python. I have a strong opinion that this should not be the case and undergraduate courses should insist on students using C/C++ as their primary language on the academic curriculum side.

C is a programming language that requires very verbose form of writing programs which will be highly helpful in learning and understanding the underlying concept thoroughly. Consider an example of quick sort. It is a single line of code in Python. But what does the student really understand out of that single line? Whereas when you write the same thing in C, it really forces you to understand the algorithm line-by-line, thereby making the student more knowledgeable about the actual working of the algorithm rather than just getting the thing done. Getting things done is top priority in an industry. But when it comes to academia, learning the underlying working is more important than getting things done.

Another good example would be writing a simple socket program. In python its a maximum of ten lines. Whereas in C you work very closely (almost with actual system calls) and hence you thoroughly understand the whole process of how a socket connection works.

More the abstraction, better the survival. This definitely holds good, but not when you are undertaking a course to become a computer engineer. Abstraction is good once you have completed the learning process. But when you are in the learning process, less abstraction is more helpful in making a student better.

-Vignesh

Wednesday, September 8, 2010

Else vs Elseif - A note about validations

Its 10'o clock when i'm writing this one (as opposed to the 7’o clock of the previous post). Today had been a productive day too with a lot of work done in a good pace. Today i had an arguement/discussion(FYI, arguEment is when you argue on a topic and argument is the one you pass to the functions in your program) with my colleague on a very very simple issue. It started when i was explaining about a piece of code i had written.

Going forward in this post, i am describing this problem and the discussion as a general article and not as a discussion.

To tell about the problem briefly, whenever we use a set of if else statements, should the last in the set be an else or an elseif ? Sounds simple right. Assume that we do these ifs in a system level program which on breaking with an irrelevant error is critical. The main points to be considered when approaching this problem are code readability and whether the code breaks (the code should not break the flow of the program by doing something unwanted). Again there definitely has to be a trade off between these two otherwise this would not be a topic to rampant an article about.

Consider a simple example of an if condition. If a boolean is true you perform an action and if the boolean is false you perform some other action.

Case 1 - if..else..:
In this case, there is an else at the end. So the code will look like this:

if a == True then return 1 else return 0


First of all, this code will always perform some action (but not necessarily the correct action). The problem with this code is that the second part is very loose. Even if the variable a has something other than False and True it will still be returning 0 which may not always be the expected behavior. Though it may seem that this option is never safe, at times it is. This type of modules will generally be some internal system code, at which point you may most likely not worry about things like input validation. So if your variable can have five possible states and you have two different action based on those states, in this approach you will be writing a piece of code like this:

if state == ‘state1’ or state == ‘state2’ then return 1 else return 0


Remember there are totally 5 possible values that state variable can take. Our objective here is to return 1 of the variable is in state1 or state2 and return 0 otherwise. This is exactly what we have wrote in this if..else.. sequence here. Is this the clean way of doing this ? Yes and No. When we are sure that we have done input validations on a high level layer and that the state variable may contain no erroneous value other than the expected 5 values, then this code will definitely suffice. If not, then we may have to rethink this since it will return 0 for not only the expected 3 values of that state variable, but for every other erroneous case too.

Case 2 - if..elseif..:
In this case, there is an elseif at the end. So the code will look like this:

if a == True then return 1 elseif a == False then return 0


Here, though we are in an internal system level module, we just put a little extra effort and add an else if constraint which makes the code stronger. Also, in the case of the 5 state example, in this case we will be listing out all the 5 possible values of the state variable verbosely and thereby in future you need not look up anywhere else for the possible values the variable can take (thus enhancing code readability). I always felt it was a good practice to consider all the validations in all layers of code as that would really help if we decide to bypass a layer for some reason.

It is very similar to doing the validations on both on the client side (using javascript) and on the server side (using a server side script like php) in a website. We do this because there is a possibility of bypassing the client side layer and invalid inputs may come to the server side and we don’t want it to break because of validations not being present on the server side.

Here, even though the variable is just a booelan, it is better to always have the most constrained form of the conditions so that with little effort you might be saving a big amount of code change when you decide to bypass a layer in the future.

The actual problem's statement now changes to this, when you have your entire system architectured into different layers (like user interface, application logic, backend, etc.) should you do validations upon entering each layer or is validation is enough in the top most layer alone ? The answer is again a yes and no. The only big point to consider before making such a decision is if you want to bypass a layer in the future then you have to change the code so that the validations are done appropriately.

Even otherwise, my opinion is that it is always a good practice to perform the validations on all the layers as there is a possibility of an input being corrupted (when a layer passes it on to the next layer or some such). This is how big a simple else vs else-if problem can lead to. When you write code that is not just going to be owned by you, it is always good to think of such issues before you write each and every single line.

This may seem like the dumbest article you have ever read. But to me, it has taught a good lession about where and where not to validate data.

Comments are welcome as always. :-)

-Vignesh